We’ve all been there. You leave the salon... and instantly regret it. You sit in the chair, smile politely, bite the inside of your cheeks. You nod. It’s fine. Totally fine. Until you get in the car, flip down the mirror — and it hits you. Your hair is a full-blown disaster.
Cue the ugly crying. The panic spiral. Flashes of this Colour at your wedding, birthday, work events. The horror.
How long did I spend in that chair for this?
I took the day off work for this??
How much did I just pay for this Colour?
And the worst one: How the hell am I going to fix it?
Before you plot revenge or grab the first supermarket box dye in sight — which, spoiler alert, won’t fix it — take a deep breath. We’re here to walk you through exactly what to do when your salon Colour goes wrong. From quick fixes to complete Colour rescues, here’s your guide to taking back control — from home.

#1 My Hair Colour Is Too Dark
Start slow. Sometimes fresh Colour just needs a few shampoos to settle. Wait a few washes, then reassess in natural light. Still feeling like it’s swallowing your features? You’ve got options.
Option 1: Lighten it just a touch?
Apply Colour Remover to damp Hair for a gentle lift — perfect if you just want to nudge the Tone a Shade or two lighter.
Option 2: Undo that recent Colour job?
If your latest Colour is simply too Dark, use one full application of Colour Remover on dry Hair to clear it out.
Option 3: Start fresh?
If you’ve got layers of Dark dye built up and you’re done with it all, begin with two rounds of Colour Remover. After the second removal, wait 24 hours to assess your Hair to see if you need to Colour Remove again. Once you have removed all your Hair Colour, wait at least 48 hours before reColouring or Toning to give your Hair (and emotions) time to settle.
Key tip: Don’t panic-bleach or layer more Colour on top. That just adds chaos. Go slow, be kind to your Hair, and you’ll come out the other side — lighter and wiser.
Keep reading:
How to Colour Remove
What To Do After Colour Removing

#2 My Colour Is Too Yellow or Brassy
You dreamed of creamy Blonde or soft, beachy highlights — and instead? You’ve got straw hair and a face full of Yellow. Or Orange. Or both. It’s not ruined, it’s just unToned — totally normal after Lightening, especially when the Warmth underneath wasn’t fully neutralised.
The fix? A Toner Kit.
Our Toner Kits are like a glossy topcoat for your Hair:
Neutralise Brassy Tones with Cool pigment
Condition dry, porous Hair — leaving it silky and smooth
Add shine and softness that screams healthy, expensive Hair Colour
Keep reading:
How To Tone
How To Tone With a Hair Colour

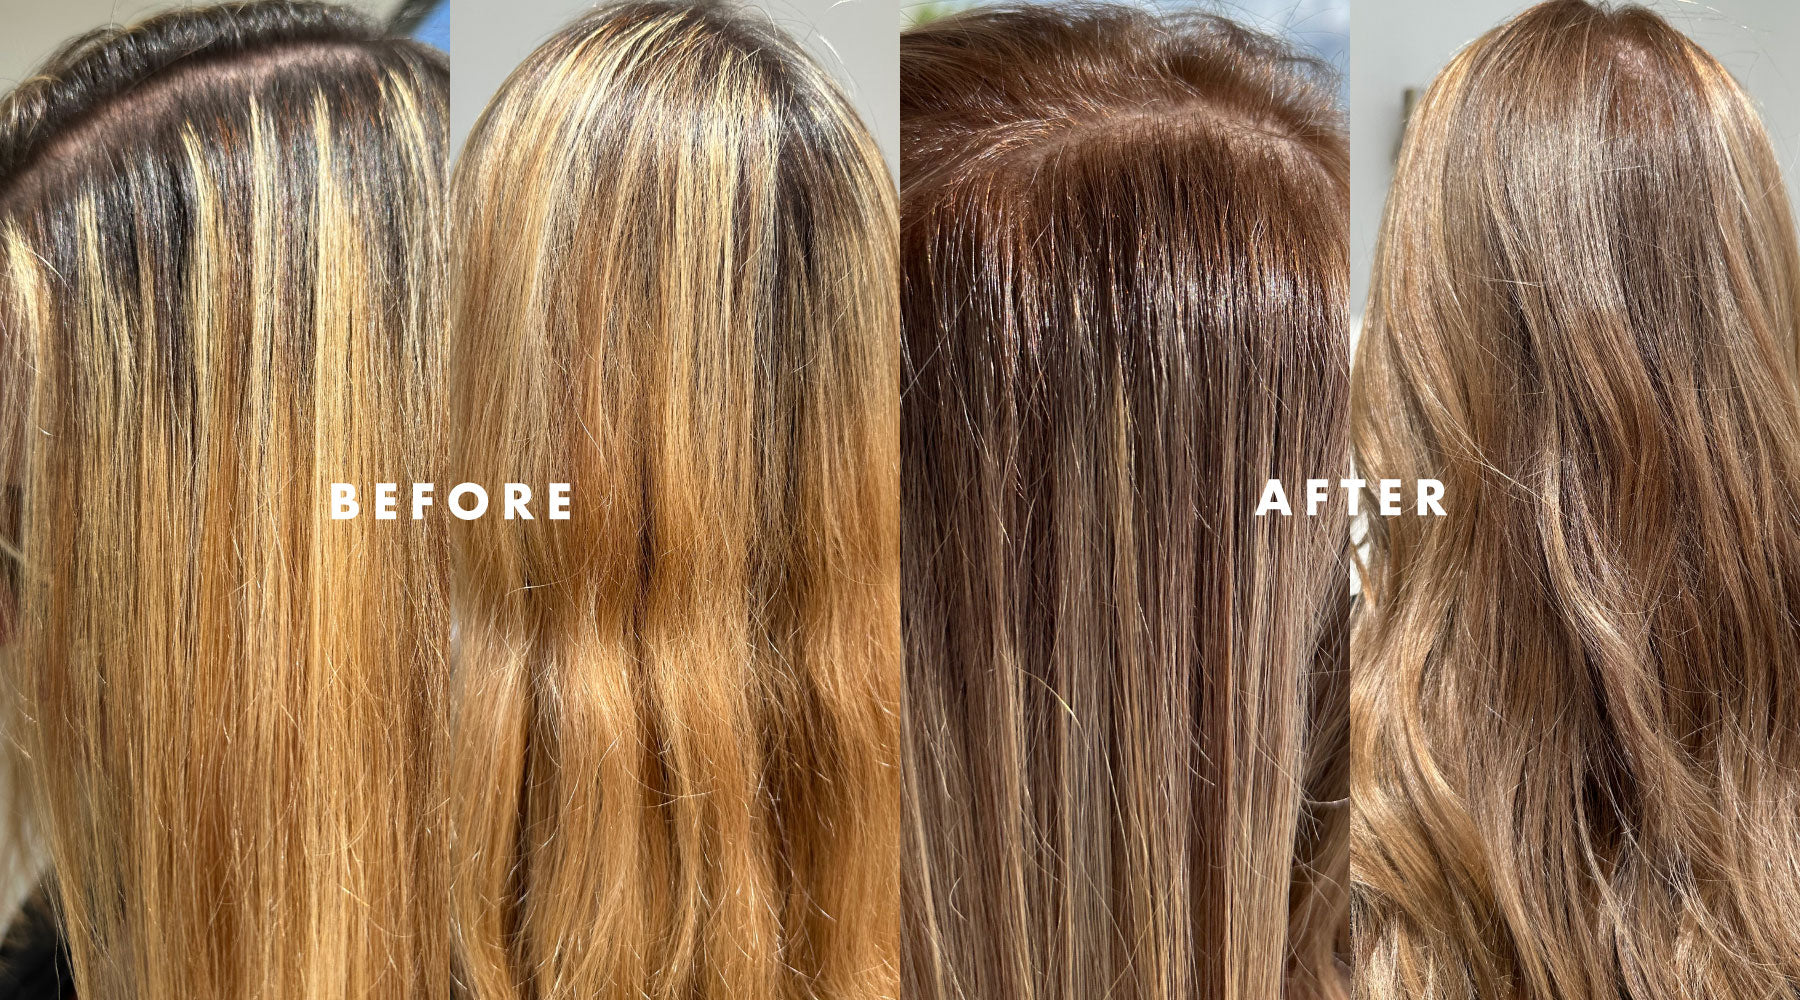
#3 You’ve Been Left With Stripes of Colour
You asked for soft, beachy dimension. You got bold, rooty stripes — more tiger than sun-kissed. To soften harsh highlights, try painting a base Colour over your Regrowth and just into the top of the streaks. Choose a Natural or Cool Shade close to your own, and stagger where you stop the Colour — no harsh lines here.
This little trick blends chunky streaks, softens contrast, and turns obvious Colour into a seamless, lived-in look.
Keep reading:
How To Fix Your Tiger Stripe Highlights

Tint Bowl
and Brush Set

#4 You Wanted a Single Shade
You asked for one all-over Colour — Marilyn Blonde, deep Brunette, whatever — and somehow ended up with foils. Don’t stress. You can still get that solid, seamless Shade you wanted.
Choose your dream Hair Colour, then paint it from roots to ends. Use a Wide Tooth Comb to gently blend the Colour through for an even, natural-looking result.
Lighter pieces will still peek through, but now they’ll look like soft dimension — not an accident.
Keep reading:
How To Lighten Your Hair
How To Colour Your Hair Dark

Wide Tooth
Comb

#5 You Hate Your Root Stretch or Lowlights
You whispered “low maintenance” or “something to break it up” and somehow ended up with muddy roots or weird dark streaks.
Lowlights are meant to add depth, but if they’re too Dark, too Red, or just not you, target those sections with Colour Remover. Once removed, follow up with a Toner Kit to Cool down any leftover Warmth — or reapply your dream Shade.
A Root Stretch is when a Darker Shade is painted at your roots and blended down to mimic your Natural Regrowth — a relaxed, low-maintenance look when done well.
But if the Colour feels too Dark, heavy, or just wrong, use Colour Remover through the root area to lift it out and reset.
ReColour with a Cooler Shade to balance any leftover Warmth, applying with a staggered technique to softly blend your roots into the rest of your Colour.
Need help figuring it out?
If you're hitting the panic button, our Colour Consultants are just an email away — judgement-free, here to help and often a place to vent.
Let’s get chatting.


