While touching up Regrowth may be the thing of nightmares for first-time home Colourers, who would typically argue that they aren't coordinated enough or they've purchased a Brunette box and swear when *they* apply it, it will come out purple — perfecting a fresh, glossy Colour and blending into a beautiful shade is easier than you think.
While your dedication right now may be to covering your greys, or in my case, a hearty stripe of dark roots that are made more pronounced thanks to my Blonde ends, perfecting your Regrowth touch up at home allows you the freedom to touch up at the drop of a hat, to extend the time between salon visits and do your Hair the way you want it to be.
Whether you need your roots done every couple of weeks or every couple of months, here is an easy-to-follow step-by-step to touching up your Regrowth at home using the Regrowth Touch Up Bundle.
Who can use the Regrowth Touch Up Bunde?
When you are Colouring Natural Hair 1-2 Shades Lighter.
When you are Colouring Natural Hair Darker.
When you are covering Grey or White Hairs.
When you want to match or blend to a previous Hair Colour.

Regrowth Touch
Up Bundle
How much product will I need?
The bundle is equipped for you to get straight to Colouring.
Half a tube of Colour and half a bottle of Developer will cover:
A small amount, around 1 - 2cm, of Regrowth.
Or 2 - 3cm over fine Hair.
A full tube of Colour and a full bottle of Developer will cover:
A small amount, around 1 - 2cm, of Regrowth over very thick Hair.
Or 2-4cm of Regrowth in average Hair thickness.
Before you start Colouring your Regrowth make sure:
Your Hair is free of styling products and dry shampoo.
Apply your mixture over unwashed Hair (your Natural oils will protect your scalp and give you a better Colour.)
Softly detangle your Hair using the Wide Tooth Comb.
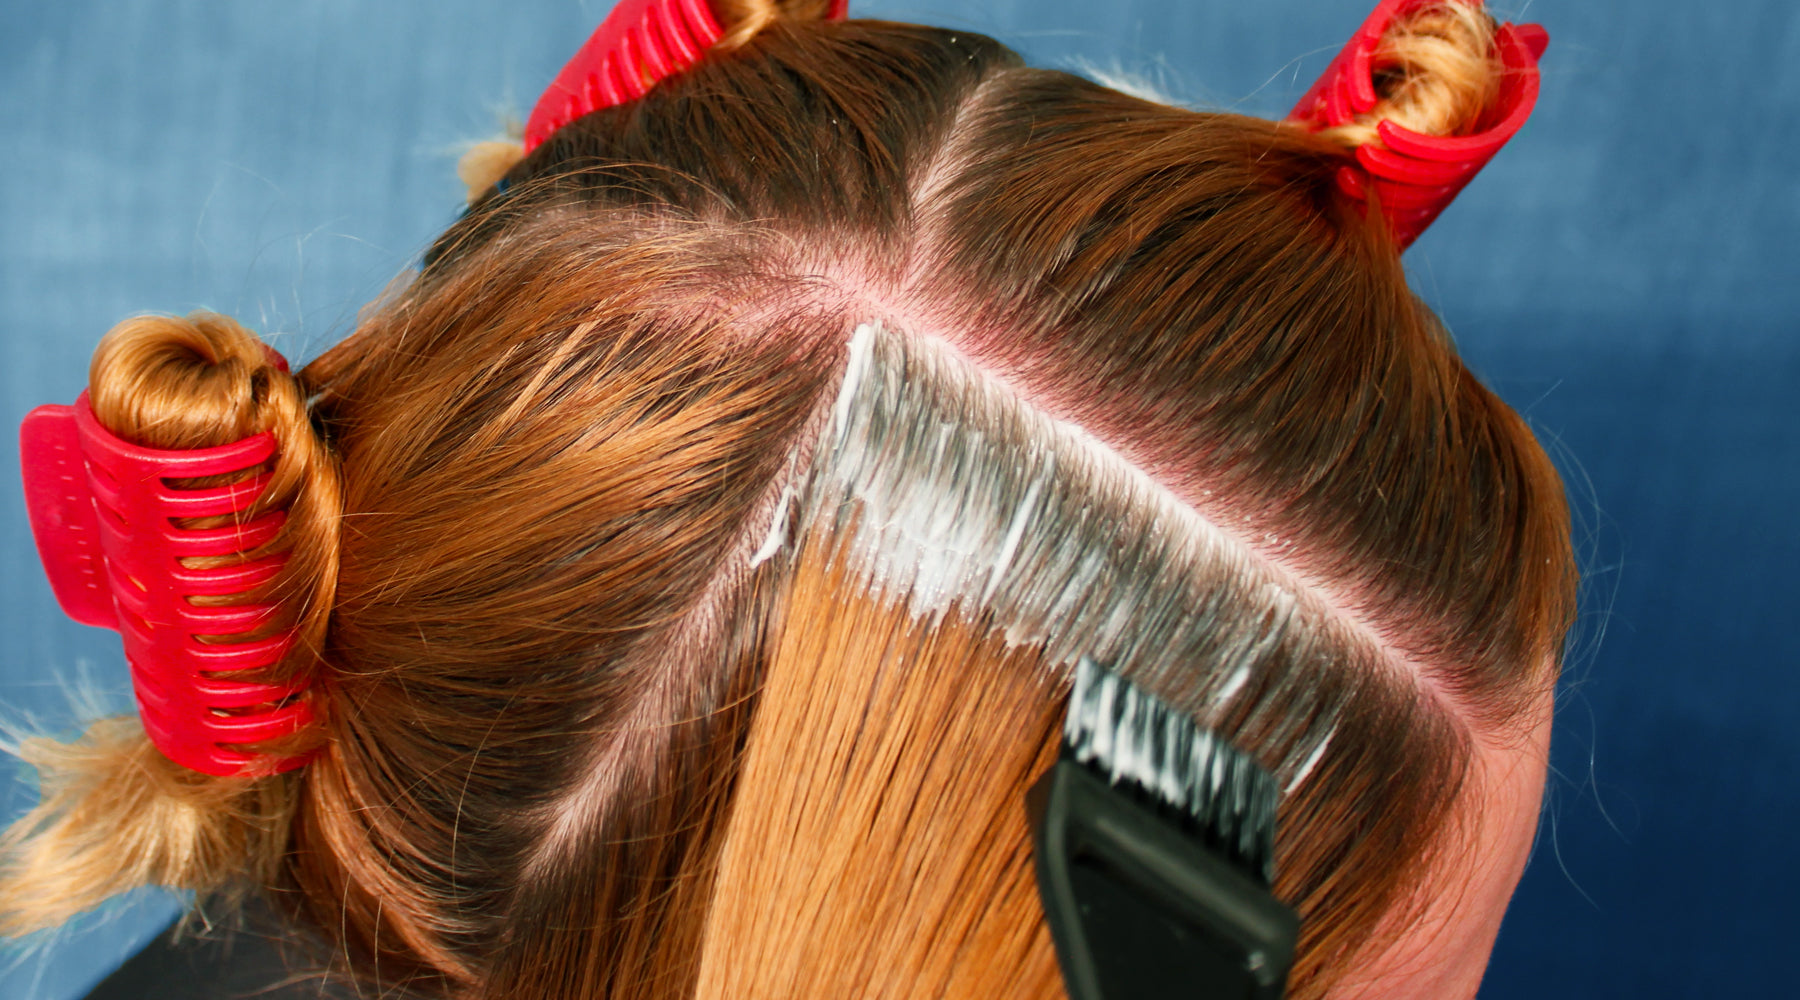
Divide Hair into 4 sections. Doing so will make working through your Hair easier and cleaner, giving you better all-round coverage.
How to apply your Colour mixture

Step 1
Start on your top two sections, beginning at your middle part. Use the end of your Tint Brush to create a 1cm thick row from the front of your head to the back of your section. Gently pull your row tight to clearly see your Regrowth line. Paint your Colour mixture over your Regrowth area, trying to avoid overlapping your Coloured ends. (Doing this will help prevent Colour Banding or Colour Build Up)

Step 2
Flip your Hair over and paint the underside of your row.
Step 3
Repeat Step 1 and 2 until you have completed each section, finishing in your back two sections.
Step 4
Once your Regrowth is completely covered, start your development clock for 35-40 minutes.
When you have stubborn Greys, allow 45 minutes to properly develop.

Step 5
During the last 10 minutes of your Colours processing time, use your Wide Tooth Comb and gently comb from your roots down to blend your Colour.
If your ends need a fresh gloss, use the Colour Top Up Technique.
Step 6
Once you have reached your development time, rinse your Hair until the water runs clear. Then shampoo and condition.
Wait at least 48 hours before you shampoo your Hair again, to allow your new Colour to settle.


