It's almost Winter (can you believe it, how did that happen?!) which we're all high-fiving and wahoo-ing about because we love a seasonal Colour change. Over the last year a major Hair Colour trend we've seen is the Colour change up, specifically, taking a Lightened Blonde and bringing depth back into it and our Colour Consultant info line has been filled with all you beautiful people saying "I want to take my Lightened Blonde back closer to my Natural Shade". (Side note: I know we go on all the time about how you all make us like proud parents, watching our novice home hairdresser's turn into pro's, but seeing your success emails are not just heart warming, they blow us away.)
One thing we've been noticing with this particular Colour change is how many of you know that you can't just go from bleached Blonde to Light Brown without filling your Colour (another proud moment) and you're seeking some guidance about your Colour choice. To that end, a new season awaits and we don't want to waste another moment. We've put together a full breakdown of how to transition your Lighter, Summer Shade to a Darker, Winter Shade.
The Benefits Of A Seasonal Change
Give your Hair a break from:
Lightening
Using strong Developers and bleach
Being fragile from the sun and product exposure
Constant applications
Using a Darker Shade will:
Give you a fresh new look
Replenish Hair with a nourishing Colour application
Give you a low maintenance Colour
Bring Colour and body back to stripped, Lightened Hair
Move away from regular and expensive salon visits
Save time and money
How To Colour From Light To Dark
After you've chosen the Darker Hair Colour you want to be, my most important piece of advice to you is to determine if you need a Colour Filler. A Colour Filler is essential if you're making a move to a Hair Colour that is 3 or more Shades Darker than your current, Lightened Shade. Never skip this step. A Colour Filler will be the difference between a beautiful new shade and a mucky green washed out one. Here is how to work out your Colour plan.
Step 1: Assess Your Hair
Begin by answering these questions:
Question 1: What is the Hair Colour you want to be?
Question 2: What is your Natural Hair Colour?
Question 3: How Light is your Blonde?
Question 1: What is the Hair Colour you want to be?
This is the Dark Shade that is your goal Colour.
Question 2: What is your Natural Hair Colour?
(Use the Natural Hair Colour chart to find the Hair Colour number that is closest to your Regrowth Colour)
Your Natural Hair Colour determines your Developer. Generally, when you're Colouring Darker your Developer choice will come down to No Lift Developer if your goal Colour is the same or Darker than your Natural Shade or 20 Volume Developer when you need to Lighten your Natural Regrowth up to 2 Shades Lighter or when you have over 50% Grey Hair.
Question 3: How Light is your Blonde?
(Use the Natural Hair Colour chart or view our Hair Colour Range to find the Hair Colour number that is closest to your Lightened Hair Colour)
This part is important because it determines if you need a Colour Filler. If you are Colouring 3 or more Shades Darker than your Lightened Hair, than you will need a Colour Filler.
Hot Tip: A Colour Filler is applied over your Lightened Hair before your goal Shade to build back the pigment that is stripped from your Hair when Lightening. A Colour Filler needs two parts: It needs to be a Hair Colour Shade with Warm pigments and should be 1-2 Shades Lighter than your goal Brunette that is always mixed with a No Lift Developer.
Step 2: Apply Your Colour Filler
If you are Colouring your Lightened Hair 3 or more Shades Darker, you will need a Colour Filler first. Mix your Colour Filler like a normal Hair Colour and apply it to your Lightened Hair. Make sure your Lightened Hair has plenty of product on it because it will suck it up like a sponge. Once you've applied it, leave it on your Hair for 35-40 minutes to process. Rinse as per instructions. When you are ready to apply your goal Colour, dry your Hair before application.
If you do not need a Colour Filler, skip to the next step.
Step 3: Apply Your Hair Colour
Applying to dry Hair, paint your goal Hair Colour mixture to your Natural Regrowth and start the timer once you've finished. Then continue to spread your Colour through your ends. Use your Wide Tooth Comb to gently comb your mixture from your Hair to ends to beautifully blend.
Hot Tip: Make sure you have enough product to fully cover your Hair.
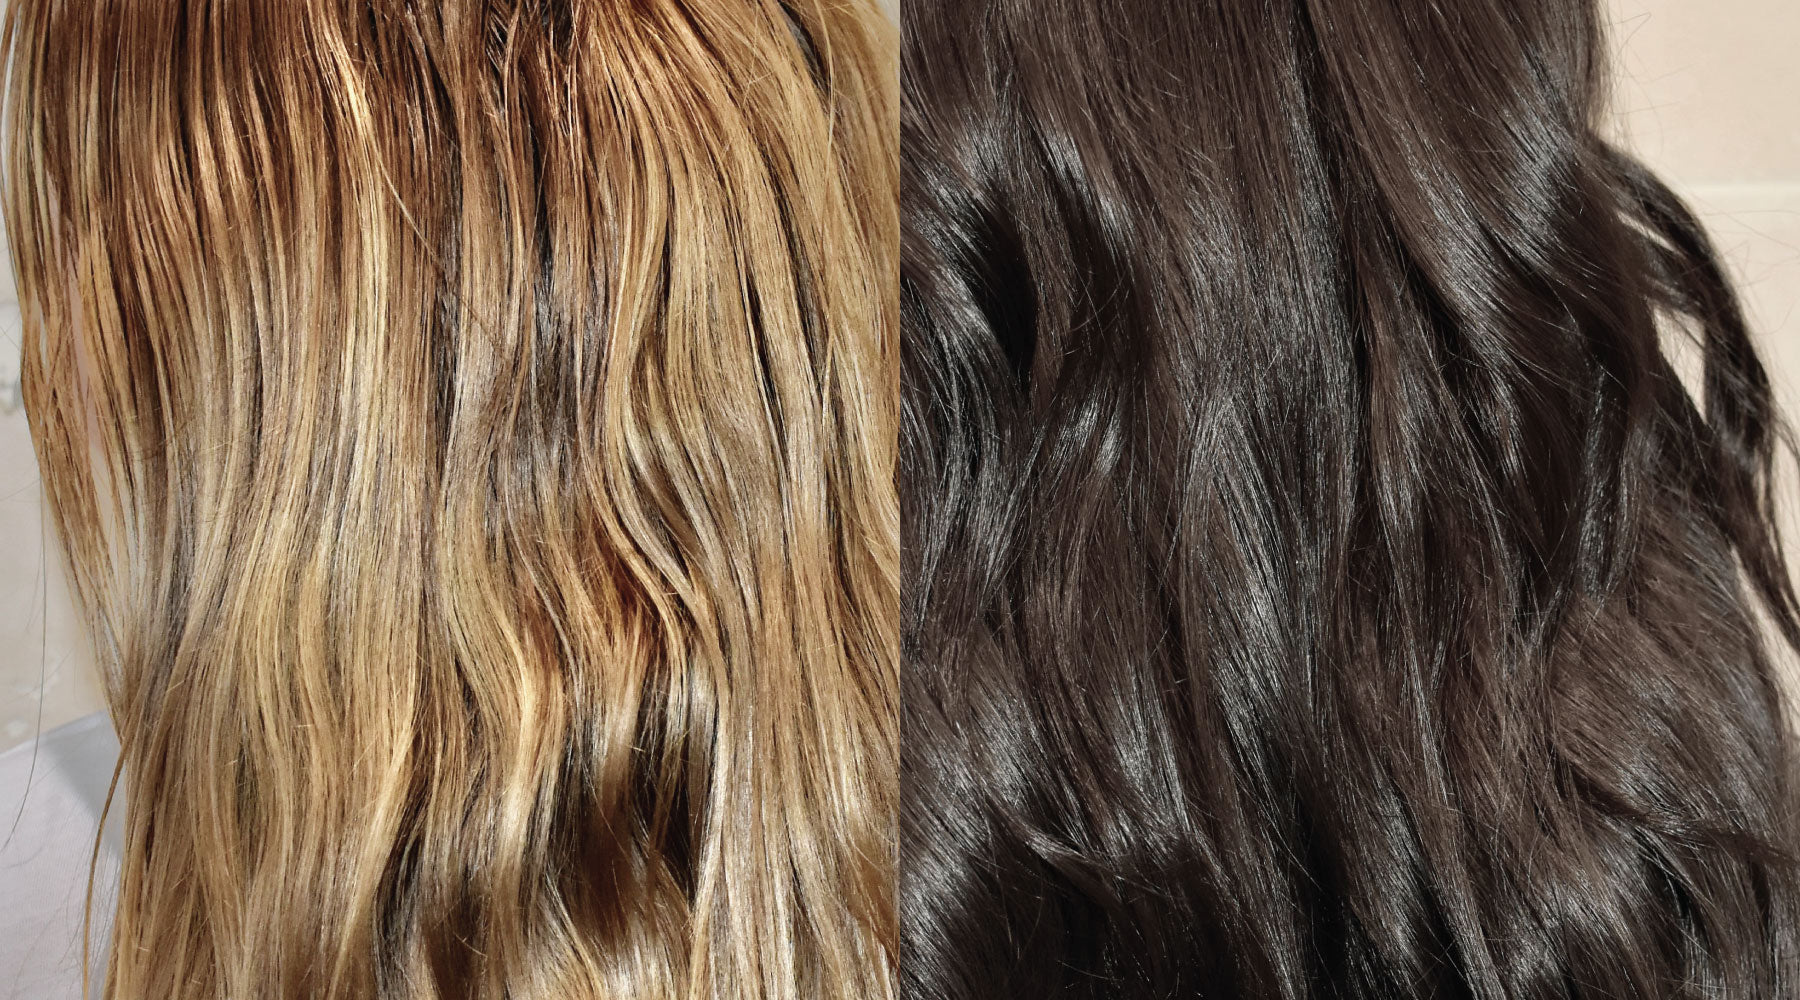
Let me show you an example from one of our team.

What is the Hair Colour you want to be?: 5.11 Intense Ash Brown
What is your Natural Hair Colour?: 7 Medium Blonde
How Light is your Blonde?: Around a 9 Very Light Blonde
Step 1: She needed a Colour Filler, so we used a full tube of 7.3 Golden Blonde and a full bottle of No Lift Developer over her Lightened Hair, ensuring her ends were thoroughly covered.
Step 2: We used a full tube of 5.11 Intense Ash Brown and full bottle of No Lift Developer all over her Regrowth, set the timer, then continued through out the rest of her Hair.
Let me show you an example from one of our customers who wanted an overhaul while embracing some lightness through her ends.

Step 1: She needed a Colour Filler, so she used a full tube of 7.3 Golden Blonde and a full bottle of No Lift Developer over her Lightened Hair.
Step 2: She applied her goal Colour, 5 Light Brown and 20 Volume Developer, to her Natural Regrowth and tapered the Colour down over the Colour Filled ends to soften the Regrowth Colour line. Then started the timer.
Then she used another Colour mixture of 7.3 Golden Blonde and No Lift Developer, the same as her Colour filler, through her Lightened ends to top up the richness through her ends. Once her ends were covered, she used a Wide Tooth Comb to gently comb from the roots to ends to blend the Colour and give it dimension.


