
Don’t go scrunching up your nose, Highlighting at Home is a thing. And in a way to help you avoid those dreadful tiger stripes, we have devised this how to guide to (hopefully) answer your questions and prove to you that you can master this whole home Hair Colour game.
Highlighting Rules:
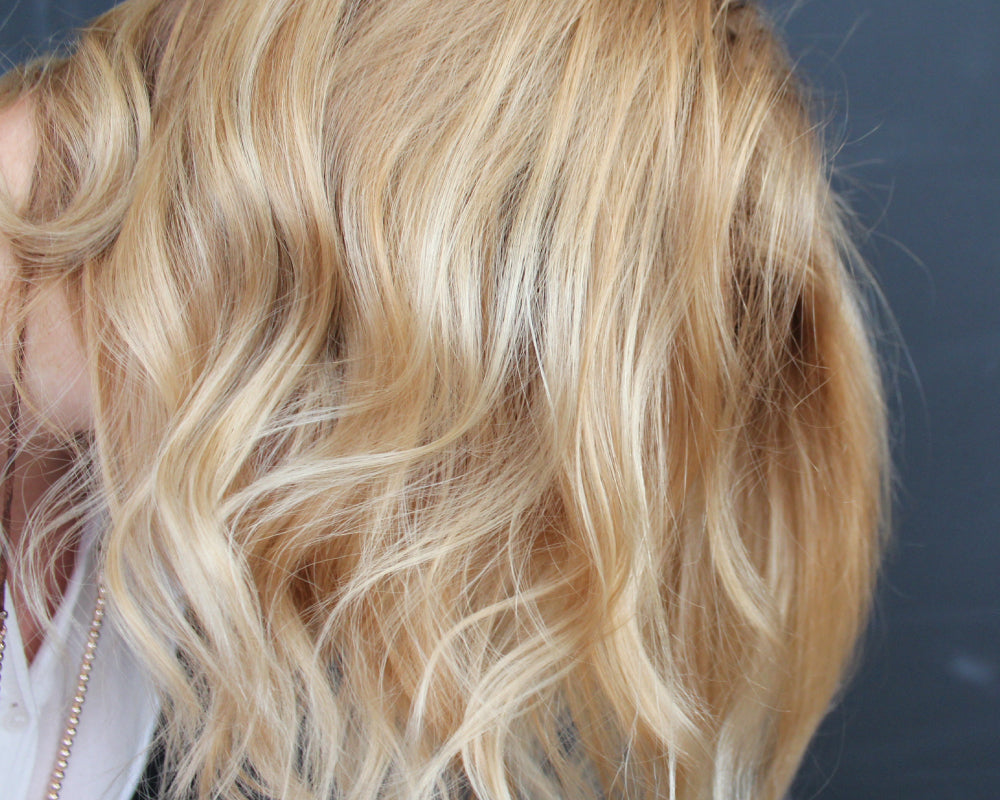
Keep your Highlights thin for a Natural look. Bigger Highlights create stripes.
Don’t group them all together. Allow adequate breathing room between them.
Use the brick technique, don’t stack them on top of each other.
Your Hair needs to be Product free and had a good comb through.
If you are Highlighting your Natural Hair Colour, choose a Colour 2 shades Lighter.
You Will Need:
Highlight Colour and Developer of your choice.
Tint Bowl and Brush.
A good comb.
Foil cut into rectangle pieces, long enough to cover and seal your Highlights.
Sectioning Clips.
How To

Step 1
Start with well brushed, dry Hair. Using a middle part, divide your Hair into 4 clear Sections. Clip each section. For more help see Hair Sectioning.
Step 2
We need to create rows to apply the Highlights. In the lower sections we create horizontal rows, in the top sections we create vertical rows. Do one section at a time.

Begin your Highlighting in the lower sections. Starting at either the centre part or Hairline, take the end of your Tint Brush or comb through the entire Hair section to create a horizontal row that is around 1-1.5cm thick. Pull the Hair tight to define your working area.
Step 3
Now the beauty of doing your Colour yourself is you can choose the type of Highlights you would prefer to do. We stick to these two options:
The Classic Highlight
This is the traditional weaving methods, you will more commonly find at the Hairdresser.

Pulling your Hair row tight, use the tip of your Tint Brush to weave through your Hair row, keeping each weave no thicker than 1/2 cm. Hold the weaved pieces of Hair and let the rest fall away.

Place foil underneath the left over Hair and paint on the Product, keeping it off the scalp.

Fold your Coloured Hair in foil and move onto your next row, using the same application. Keep your Highlights few and far between through the back of your Hair. Continue until you finish each section.

Once you move onto the top sections, change your rows to vertical. Beginning at your middle part, create rows working down to your ear. Weave more strands, keeping them small and around the face to frame your face for a Natural looking Colour.
The Casual Highlight
This style is a casual, painting method that is perfect for a Natural and easy grow out - great for low maintenance Colourer’s.

Begin by creating a row of Hair and applying the foil underneath.

Starting a few cm’s off the scalp (we like to vary the starting spot throughout the Hair) use the narrow side of the Tint Brush - for a detailed application - and paint 1/4 - 1/2 cm Highlights, thickening the stroke at the ends.
Or use your index finger and thumb to pull out pieces of Hair and pull the Colour through to the ends, keeping the pressure light at the top of the Hair and stronger towards the end.
Fold your Coloured Hair in foil and move onto your next row, using the same application. Continue until you finish each section.
Once you have finished the lower sections, move onto the top sections, changing your rows to vertical. Stagger your Highlights around your face, keeping them small and subtle to frame your face.
This is a free application. You can leave some rows out and play with the variation to keep a Natural and not so stacked look.
Tips
Keep an eye on your processing Colour. If your Hair in the lower sections is getting too hot and developed, remove the foils. Make sure you keep track of your timing, to not over process your Colour. Try and get the job done as quickly as possible. Don’t exceed the Colour processing time.
If you have thick Hair, consider getting help or use a person to do each side of the head.


