Ever found yourself staring at your reflection, wondering how your Hair ended up this way? Feeling defeated and overwhelmed at the thought of sitting in that 'hot seat' at the salon? The dread of potential judgment, combined with the prospect of a lengthy 4+ hour correction, amplifies the typical salon anxieties: Do I need to socialise? Can I get work done? When can I fit this in? Do I even have the time or budget for it all?
Let me take those worries off your shoulders and show you how to do a DIY Hair Colour correction at home. No salon stress, no judgments—just you, in the comfort of your own space, on your own schedule, and saving you time and money
I will start by saying the reason for a Colour Correction is diverse. Colour Corrections are for anyone who has made a rash call and thrown on a box Colour then regretted it, tried a new Colour and hated it, found your Hair Colour is too dark, accidentally over Toned, noticed your Hair Colour is patchy, murky and full of Build Up or can no longer see their past Highlights.
Begin by Colour Removing to cleanse your Hair of artificial pigment. Our Colour Remover is bleach-free and gently removes unwanted Colour like you're hitting undo.
Start with one all over Colour Removal process, applying it all over Coloured Hair. Remember to apply your product mixture quickly, ensuring your Hair is well covered, then wrapping in cling wrap to get the best results.

Colour
Remover
After the Colour Removal process, assess your dry Hair. Look for evenness in Colour and identify areas that still have Colour Build Up or Banding. If needed, target these areas with another application of the Colour Remover until you achieve a lighter and brighter look. You will also find your Hair feels and looks noticeably healthier and silkier. When you are confident your Colour pigment has been fully removed, leave your Hair for at least 48 hours to allow it to settle.
Tip: Always apply Colour Remover to dry Hair, focusing on the area where the Colour pigment is and not wasting product on your Natural Hair.
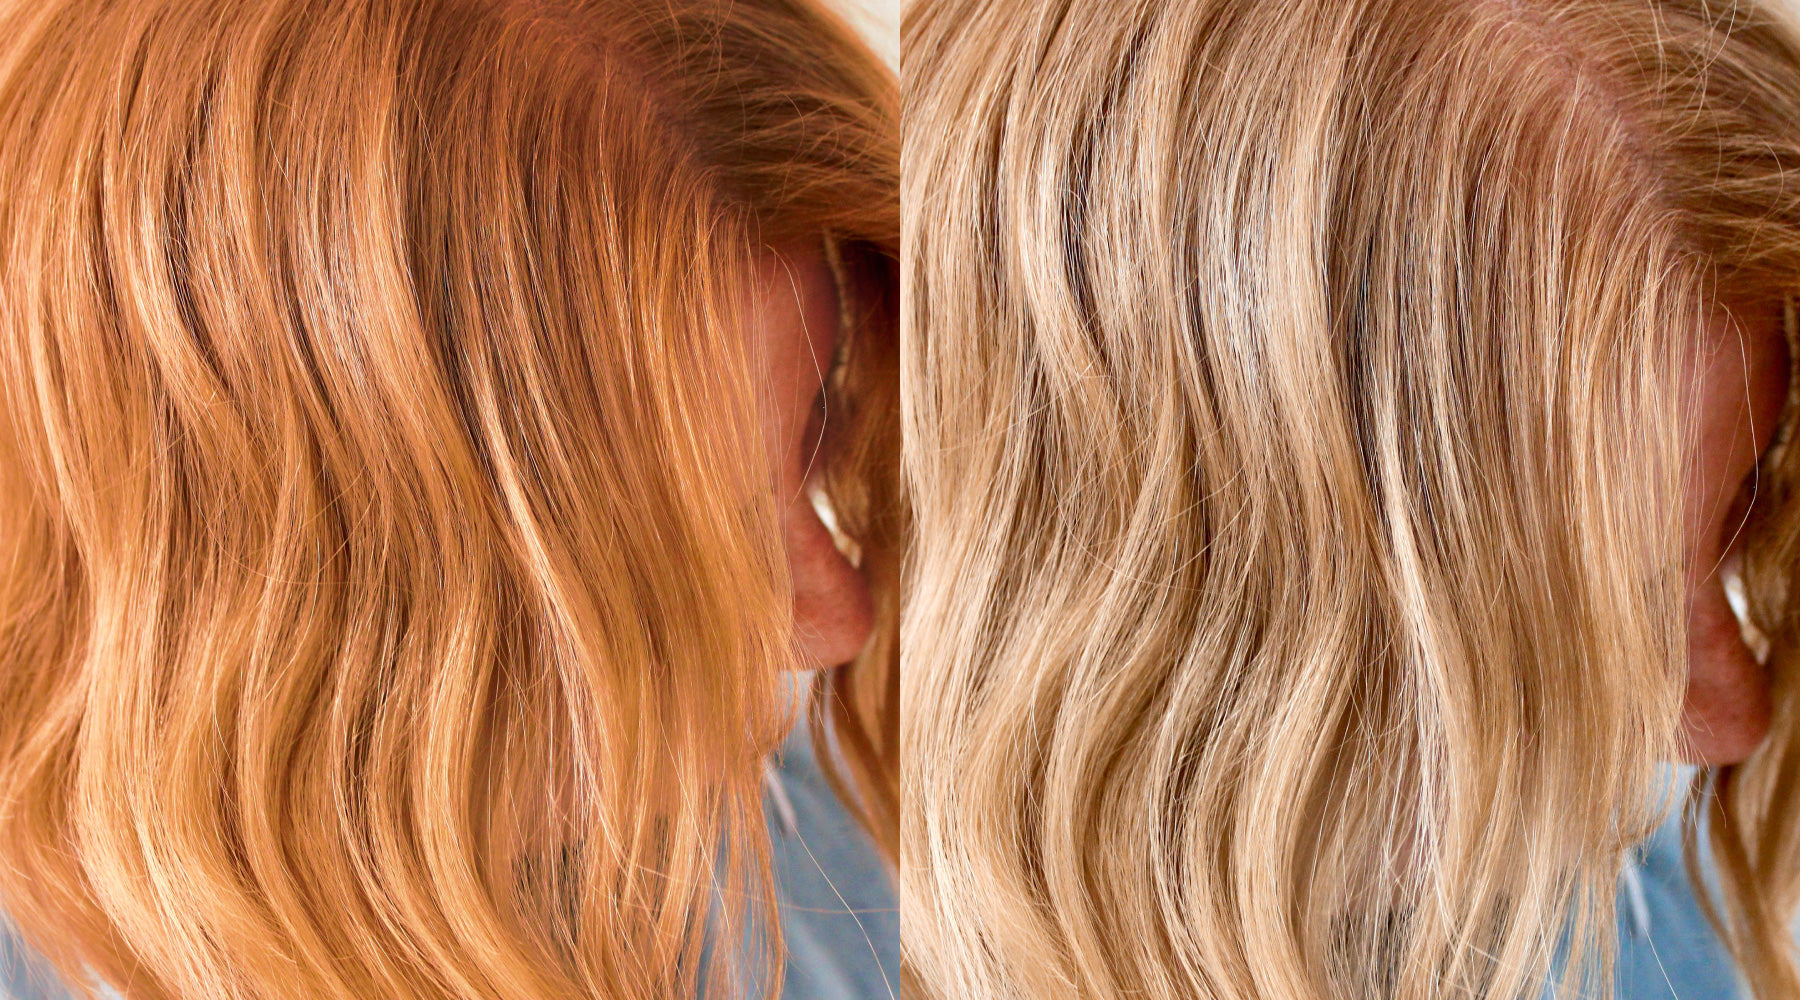
As I mentioned, after using Colour Remover, your Hair will be Warm (Orange and Yellow Tones)—this is a good sign! Now, let's explore your options and decide what to do next.
Toning the Warmth
Most commonly the focus after Colour Remover is Cooling the Warmth with a soft gloss of Colour to restore your Hair. This is when we call on our Toner Kits to absorb the Warmth. To leave your Hair Colour dazzling in creamy Cool Tones use the Pearl Blonde Toner Kit. When you want a true neutral Colour featuring sleek Ashy Tones choose from the Light Ash, Dark Ash, Extra Light Silver or Intense Ash Brown Toners.


Tip: Choose a Toner Kit that is Lighter than the Colour you want to achieve. The Dark Ash and Intense Ash Brown Toners are specially designed to Cool Brassiness in Dark Blonde and Brunette Shades.
Apply your Toner over your Colour Removed Hair, keeping a close eye on your Hair while it Tones. As everyone's Hair Tones at different speeds, we recommend leaving your Toner on for 5-20 minutes, until you've reached the look you want.
If you have Regrowth, that needs to be Coloured first before you Tone. Choose a Colour close to your Natural and apply to your Natural Regrowth only. Then apply your Toner over your Colour Removed Hair.
Recolouring
If you plan to recolour your hair after Colour Removing, opt for a Hair Colour that is 2 Shades lighter than your desired Colour. Apply the new Colour strategically, focusing on Regrowth and Toning the ends for a seamless blend. For example, you want to be 6.2 Dark Beige Blonde so you choose an 8.2 Light Beige Blonde. Use the Gloss Over Technique over your entire Hair to enhance it with shine and Colour.


If you have Regrowth, break your Hair into 2 applications in 1 process.. The first is to the Hair Colour and Developer for your Regrowth, the second is your Toner application. For example: Your Hair is Naturally 5 Light Brown and you have Colour Removed the Colour that was applied over your previous Highlights. Now you want a softer, Natural blend that sits around a Medium Blonde.
Application 1: Use 7.1 Ash Blonde and 20 Volume Developer over your Regrowth and set your timer.
Application 2: During the final 20 minutes of your Regrowth processing apply the Light Ash Toner Kit through your Warm ends. Once your Toner is applied, gently comb from your Roots to your ends to blend the Colours.


Transforming to a New Shade
Or are you ready to move onto a whole new Shade? Let's say you were Colouring with 7.46 Rich Copper Red and it was too Red and Dark, time to swap to brighter Shade. After a successful Colour Removal, you have a small amount of Regrowth. So we'll do 2 applications in 1 process.
Application 1: Use 8.44 Intense Copper Blonde and 20 Volume Developer over your Regrowth.
Application 2: Apply the Strawberry Blonde over your Colour Removed ends. We chose a different Shade to keep the ends Lighter and brighter. Gently comb from your Roots to your ends to blend the Colours.


If you're ready to embark on a big Colour transformation and you want some Colour advice, email our Colour Consultant team and they can help with your step by step questions and product choices. Ask them to create a Cart so you can simply check out - let them do all the work for you!


